The worst time to discover your air conditioner has a problem is during the first heat wave of summer. By then, HVAC companies are flooded with emergency calls, and you could be waiting days for service in sweltering heat. Spring is the ideal time to prepare your AC system for the cooling season ahead.
This checklist covers the DIY steps you can do yourself plus what to expect from a professional tune-up. Together, they help ensure your AC runs efficiently, reliably, and affordably all summer long.
What You Will Need
- New HVAC filter (correct size and MERV rating)
- Garden hose with spray nozzle
- Coil cleaner (optional, for condenser cleaning)
- White vinegar or bleach (for condensate drain)
- Level (to check condenser unit)
- Screwdriver
- Shop vacuum
- Flashlight
Time estimate: 1 to 2 hours for DIY steps Difficulty level: Easy to moderate
DIY Spring AC Maintenance Checklist
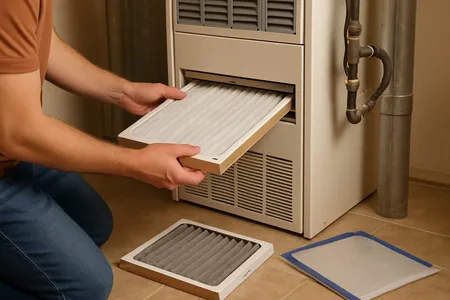
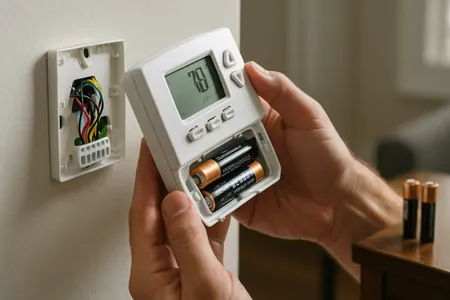
Step 1: Replace the Air Filter
This is the single most important step. A dirty filter from winter restricts airflow, reduces efficiency, and can cause the evaporator coil to freeze.
- Check the filter size printed on the existing filter frame.
- Install a new filter with a MERV rating of 8 to 13.
- Write the installation date on the filter frame with a marker.
- Plan to check and change it every 30 to 90 days throughout the cooling season.
For detailed instructions, see our complete furnace filter guide.
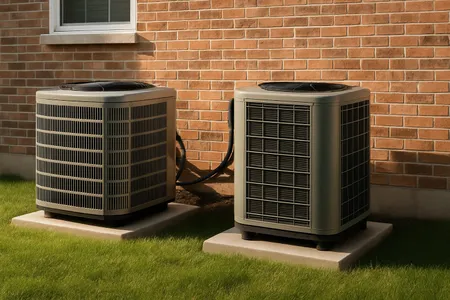
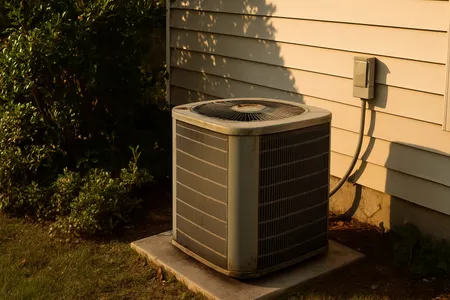
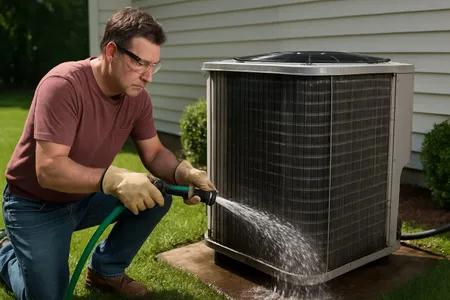
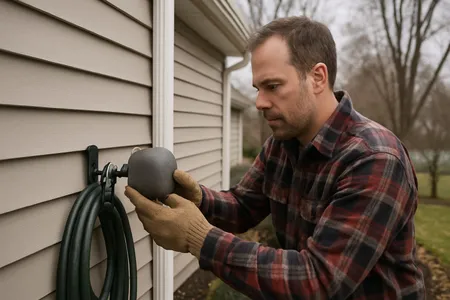
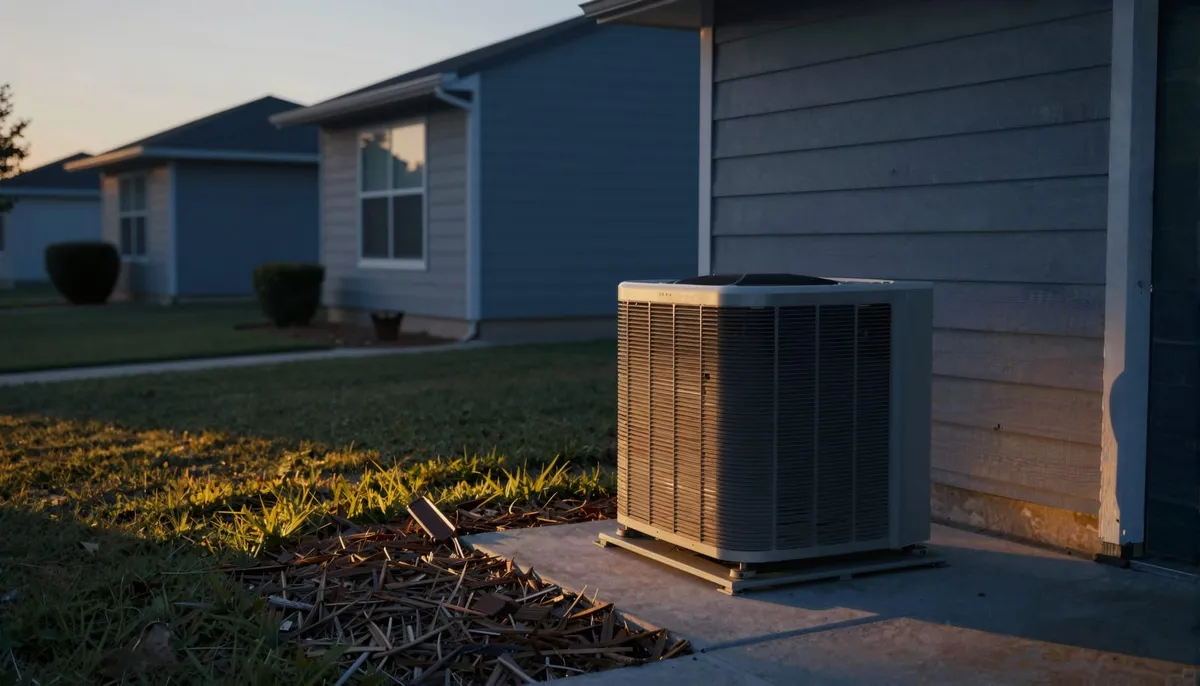
Step 2: Clean the Outdoor Condenser Unit
Your outdoor unit has been accumulating leaves, dirt, and debris all winter. A dirty condenser works harder and uses more energy.
- Turn off power at the disconnect box near the unit.
- Remove any leaves, sticks, and debris from around and on top of the unit.
- Trim vegetation to maintain at least two feet of clearance on all sides.
- Spray the condenser coils with a garden hose from the inside out to flush dirt from the fins.
- Straighten any bent fins with a fin comb.
- Restore power.
For a more thorough cleaning, see our guide on how to clean your AC condenser.
Step 3: Clear the Condensate Drain Line
The condensate drain removes moisture that your AC extracts from indoor air. A clogged drain line can cause water damage, mold growth, and system shutdowns.
- Locate the condensate drain line. It is typically a PVC pipe near the indoor air handler that drains outside or into a floor drain.
- Pour one cup of white vinegar or a mixture of one tablespoon of bleach and one cup of water into the drain line access point (usually a T-shaped vent tee with a removable cap).
- Wait 30 minutes.
- Flush with warm water.
- Check the outdoor drain point to confirm water flows freely.
Repeat this process every two to three months during the cooling season to prevent algae and mold buildup.
Step 4: Check and Open All Vents and Registers
Walk through every room in your home and:
- Ensure all supply and return vents are open and unobstructed.
- Move furniture, curtains, rugs, and other items away from vents.
- Vacuum dust and debris from vent covers.
- Check that register dampers are in the open position.
Blocked vents create pressure imbalances that reduce efficiency and put strain on the blower motor.
Step 5: Test the Thermostat
Switch your thermostat to cooling mode and set it at least 3 to 5 degrees below the current room temperature.
- Verify the system turns on within a few minutes.
- Confirm cool air is coming from the supply vents.
- Check that the display reads accurately by comparing it to a separate thermometer.
- Replace thermostat batteries if applicable.
- If you have a programmable or smart thermostat, update the schedule for your summer routine.
If the thermostat is not responding correctly, try resetting it using our thermostat reset guide.
Step 6: Inspect the Condensate Drain Pan
The drain pan sits beneath the indoor evaporator coil and catches condensation. Over time, it can develop rust, cracks, or clogs.
- Locate the drain pan under the air handler or furnace.
- Check for standing water, which indicates a clogged drain.
- Inspect for rust, cracks, or damage.
- Clean the pan with a mixture of warm water and mild soap.
A cracked or rusted drain pan can cause water damage to ceilings and floors if not addressed.
Step 7: Inspect Visible Ductwork
If you have exposed ductwork in your basement, attic, or crawl space:
- Look for disconnected joints or separated sections.
- Feel for air leaks at joints and connections.
- Check for crushed or kinked flexible duct.
- Look for visible holes or tears.
Leaky ductwork can waste 20 to 30 percent of your cooled air according to the Department of Energy. Seal accessible leaks with mastic sealant or metal-backed tape (not standard duct tape, which deteriorates over time).
Step 8: Check the Condenser Unit’s Level
Over time, the condenser pad can settle or shift, causing the unit to tilt. A significantly unlevel unit can affect refrigerant flow and compressor performance.
Place a level on top of the unit. If it is noticeably off-level, use composite shims or adjust the pad to bring it back to level. Minor variations are acceptable, but if the unit has shifted significantly, have a professional assess it.
Step 9: Inspect the Refrigerant Lines
The two copper pipes running between the outdoor condenser and the indoor air handler are the refrigerant lines. The larger pipe (suction line) should be wrapped in foam insulation.
- Check that the insulation is intact and not deteriorated or missing.
- Replace any damaged insulation with new foam pipe insulation, available at hardware stores.
- Look for oil stains near connections, which can indicate a refrigerant leak. If you see oil stains, call a professional.
Step 10: Turn the System On and Monitor
After completing the checklist:
- Set the thermostat to cooling mode at a comfortable temperature.
- Let the system run for 15 to 30 minutes.
- Check that cool air is flowing from all supply vents.
- Listen for unusual noises (grinding, squealing, rattling, or clicking).
- Check the outdoor unit to confirm the fan is spinning and warm air is being discharged.
- Note any unusual smells (musty odors may indicate mold on the evaporator coil).
If everything runs smoothly, your system is ready for summer. If you notice any issues, schedule professional service before the peak season.
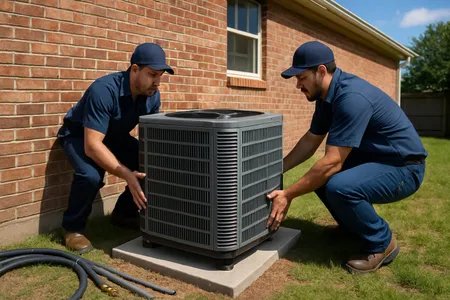
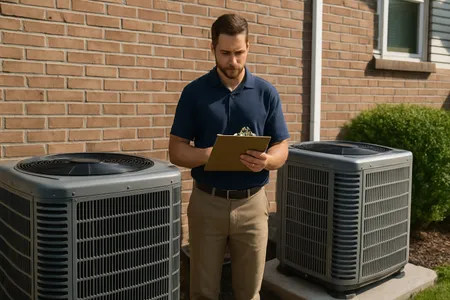
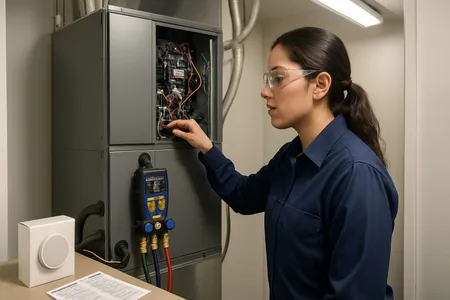
What to Expect from a Professional Spring Tune-Up
A professional AC tune-up typically costs $75 to $200 and covers everything you cannot safely or effectively do yourself:
| Service Item | What the Technician Does |
|---|---|
| Refrigerant check | Measures levels and checks for leaks |
| Electrical inspection | Tightens connections, tests capacitors and contactors |
| Compressor test | Measures amp draw and operating pressures |
| Evaporator coil cleaning | Cleans the indoor coil (inaccessible to most homeowners) |
| Blower motor inspection | Checks operation, cleans if necessary |
| Thermostat calibration | Verifies accuracy and proper operation |
| Safety controls | Tests high-pressure and low-pressure switches |
| System performance | Measures temperature differential across the coil |
The ideal temperature differential (supply air temperature minus return air temperature) should be 15 to 20 degrees. If it is outside this range, the system needs attention.
Safety Warnings
- Always turn off power to the outdoor unit at the disconnect box before cleaning or inspecting it.
- Do not attempt to check or add refrigerant. Refrigerant handling requires EPA certification and specialized equipment.
- Do not remove the indoor evaporator coil access panel. The evaporator operates under pressure, and improper handling can cause injury or damage.
- If you detect a gas odor near your HVAC system, leave the area and call your gas company immediately.
- Do not use a pressure washer on the condenser unit. It will damage the fins.
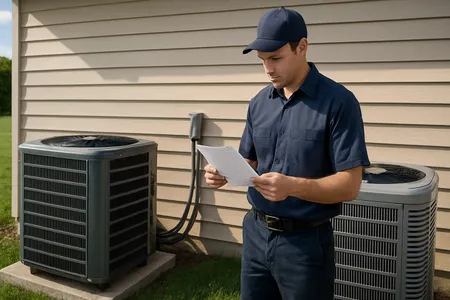
When to Call a Professional
Schedule professional service if:
- The system is not cooling effectively despite a clean filter and clear condenser
- You hear unusual noises during operation
- The system short cycles (turns on and off rapidly)
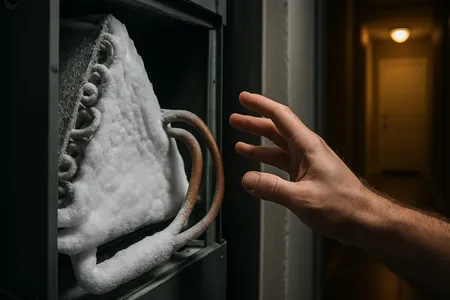
- Ice forms on the refrigerant lines or outdoor unit during operation
- Water is leaking from the indoor unit
- Your energy bills are significantly higher than the same period last year
- The system has not been professionally serviced in over a year
Book a spring tune-up through our maintenance page or call us directly.
Frequently Asked Questions
How early should I service my AC before summer?
Schedule your professional tune-up in March or April, before the cooling season begins. This gives you time to address any issues found during the inspection without the urgency and long wait times of peak summer demand.
How often should my AC be professionally serviced?
Once per year is the minimum recommendation. The best time is in spring before the cooling season. If you have a heat pump that provides both heating and cooling, schedule service twice per year: once in spring and once in fall.
Can I prepare my AC for summer myself?
You can handle most of the steps in this checklist yourself. However, a professional tune-up covers critical items like refrigerant level verification, electrical testing, and evaporator coil cleaning that require specialized tools and training.
What is the ideal temperature to set my AC in summer?
The Department of Energy recommends 78 degrees when you are home, 85 degrees when you are away, and 82 degrees when sleeping. These settings balance comfort and energy savings. Learn more in our thermostat settings guide.
Ready to schedule your spring AC tune-up? In Central Texas, Texas Temp Masters offers comprehensive air conditioning maintenance to keep your system running at peak efficiency all summer. Call (817) 704-0706 to book your appointment before the rush.
Next Steps
You have prepped your AC for summer — now make sure it stays in top shape all season:
- Build your maintenance schedule — Use our free Maintenance Checklist to get a personalized month-by-month plan based on your system type and local conditions.
- Order the right filter — Not sure what size you need? Our Filter Size Finder identifies the correct filter dimensions and MERV rating for your unit in seconds.
- Lower your summer energy bills — Our Thermostat Savings Calculator shows exactly how much you can save by adjusting your temperature settings throughout the day.
- Deep clean your condenser — Ready for a more thorough cleaning than a hose rinse? Follow our step-by-step guide on How to Clean Your AC Condenser for a professional-level result.
- Ready for a professional tune-up? — Contact us to schedule your spring maintenance visit before the summer rush begins.