Changing your furnace filter is the single most important maintenance task you can do for your HVAC system. A clean filter improves air quality, reduces energy costs, and prevents premature system failure. Best of all, it takes about five minutes and requires no special tools.
What You Will Need
- New furnace filter (correct size and MERV rating)
- Flashlight (optional, for inspecting the filter slot)
- Trash bag (for the old filter)
- Pen and paper or phone (to note the filter size)
Time estimate: 5 to 10 minutes Difficulty level: Beginner (no tools or HVAC experience required)
Step 1: Turn Off Your HVAC System
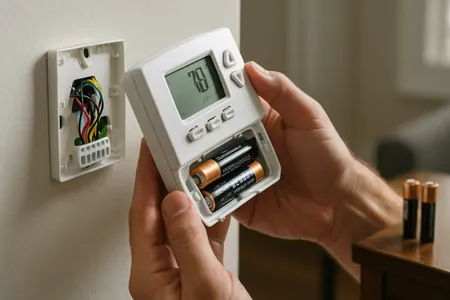
Turn off your furnace or air handler at the thermostat by switching it to the OFF position. This prevents the system from cycling on while you are changing the filter, which would pull unfiltered air through the system.
While the system will not be damaged if it runs briefly without a filter, it is best practice to have it off during the swap.
Step 2: Locate Your Filter
Your furnace filter can be in one of several locations depending on your system setup:
- Return air duct: The most common location. Look for a large rectangular vent on the wall or ceiling with a hinged or removable grille. There may be multiple return vents in larger homes.
- Blower compartment: Open the access panel on the front of your furnace or air handler. The filter sits between the return air duct and the blower fan.
- Filter rack or slot: Some systems have a dedicated filter rack mounted on the side of the furnace, often with a visible handle or pull tab.
If you are unsure where your filter is located, check your HVAC system’s owner’s manual or look for a slot or door near the air handler.
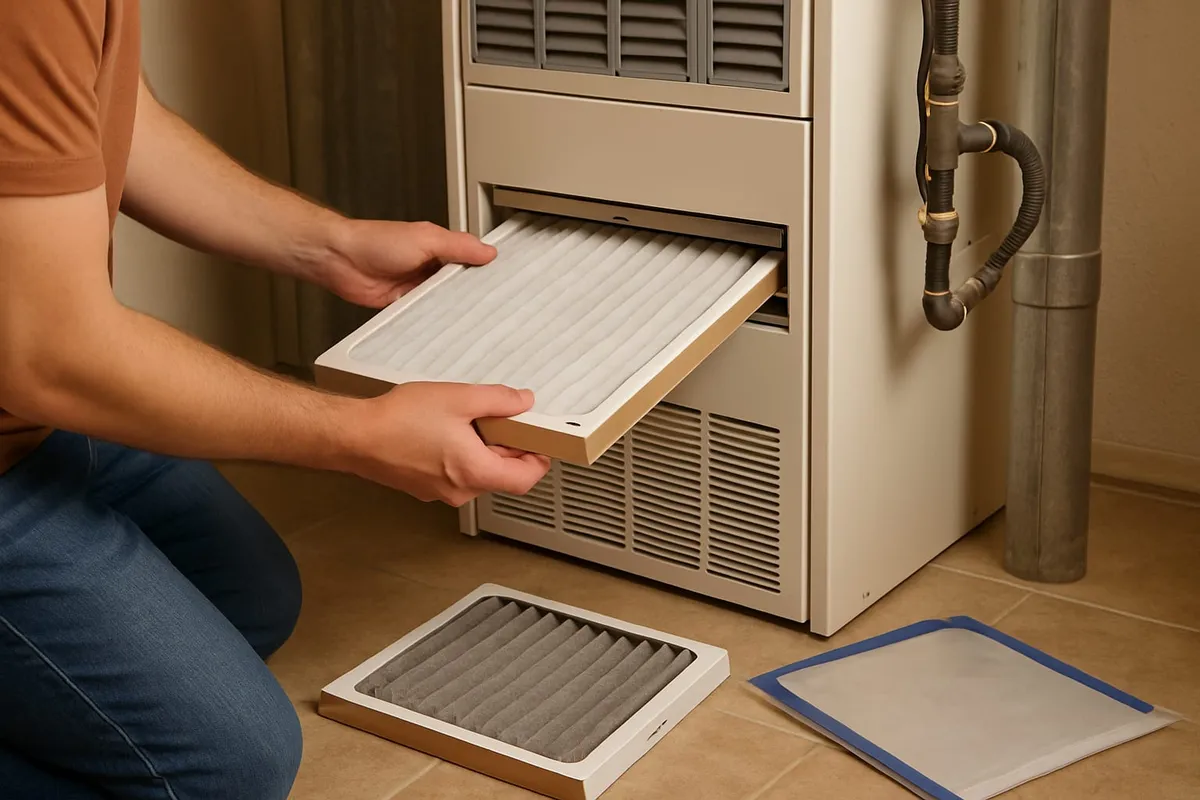
Step 3: Remove the Old Filter and Check the Size
Slide the old filter out of its slot. Before disposing of it, note the dimensions printed on the frame. Common residential filter sizes include:
| Common Sizes | Thickness Options |
|---|---|
| 16 x 20 | 1 inch, 2 inch, 4 inch |
| 16 x 25 | 1 inch, 2 inch, 4 inch |
| 20 x 20 | 1 inch, 2 inch, 4 inch |
| 20 x 25 | 1 inch, 2 inch, 4 inch, 5 inch |
| 20 x 30 | 1 inch |
| 24 x 24 | 1 inch |
| 25 x 25 | 1 inch |
Important: The size printed on the filter is the nominal size, not the exact measurement. The actual physical dimensions are typically 0.25 to 0.5 inches smaller in each direction to fit properly in the slot. Always match the nominal size printed on your old filter, not a tape measure reading.
Take a photo of the old filter’s label with your phone so you can easily match the size and MERV rating when shopping for replacements.
Step 4: Choose the Right MERV Rating
MERV stands for Minimum Efficiency Reporting Value and measures how effectively a filter captures airborne particles. Higher MERV ratings capture smaller particles but also restrict more airflow.
| MERV Rating | What It Captures | Best For |
|---|---|---|
| MERV 1–4 | Large dust, lint, pollen | Minimal protection (not recommended) |
| MERV 5–8 | Mold spores, dust mites, pet dander | Most homes without allergies |
| MERV 8–11 | Fine dust, auto emissions, legionella | Homes with pets or mild allergies |
| MERV 11–13 | Bacteria, smoke particles, fine allergens | Homes with allergies or asthma |
| MERV 14–16 | Viruses, carbon dust, fine particles | Hospitals and labs (not for most homes) |
Recommended MERV Rating for Most Homes
MERV 8 to 11 offers the best balance of air quality and airflow for residential systems. MERV 13 is the highest most residential HVAC systems can handle without airflow restriction.
Warning: Do not use a filter with a MERV rating higher than what your system is designed for. Excessively high MERV ratings restrict airflow, which can cause the evaporator coil to freeze, the blower motor to overheat, and energy bills to increase. Check your HVAC system manual or ask your technician for the maximum recommended MERV rating.
Step 5: Install the New Filter
-
Locate the airflow arrow printed on the frame of the new filter. This arrow must point toward the furnace or air handler, in the direction the air flows from the return duct to the blower.
- If the filter is in a wall or ceiling return vent, the arrow points toward the wall or ceiling (away from the room).
- If the filter is in the blower compartment, the arrow points toward the blower fan.
-
Slide the new filter into the slot in the same orientation as the old one. It should fit snugly without being forced.
-
Close any access panel or vent cover and secure latches or screws.
-
Turn your HVAC system back on at the thermostat.
-
Write the installation date on the filter frame with a marker so you know when it was last changed.
How Often Should You Change Your Furnace Filter?
| Filter Thickness | Replacement Frequency |
|---|---|
| 1 inch | Every 30–90 days |
| 2 inch | Every 90 days |
| 4 inch | Every 6–9 months |
| 5 inch | Every 9–12 months |
Factors That Require More Frequent Changes
- Pets in the home (especially shedding breeds)
- Household members with allergies or asthma
- Nearby construction or renovation
- Dusty environments or dirt roads nearby
- Running the system continuously
- Multiple occupants in the home
In these situations, check your filter monthly and replace it when you can no longer see light through it.
Safety Warnings
- Always turn off the system before changing the filter. Running the system without a filter, even briefly, allows dust and debris to coat the evaporator coil and internal components.
- Never operate your HVAC system without a filter. This allows contaminants to build up inside the system, reduces indoor air quality, and can lead to expensive repairs.
- Dispose of old fiberglass filters in a sealed trash bag to prevent releasing trapped dust and allergens back into your home.
When to Call a Professional
While changing a furnace filter is a straightforward DIY task, contact a professional if:
- You cannot locate your filter or filter slot
- The filter appears to be a non-standard or custom size
- Your system has multiple filter locations and you are unsure if you have found them all
- The filter slot or housing is damaged, bent, or does not hold the filter securely
- You notice the filter is excessively dirty after just a week or two (this may indicate a ductwork issue)
- The system does not restart properly after changing the filter
Schedule regular professional maintenance through our maintenance page to ensure your entire system is operating efficiently.
Related Maintenance Tips
Changing the filter is just one part of keeping your HVAC system healthy. Here are additional tasks to consider:
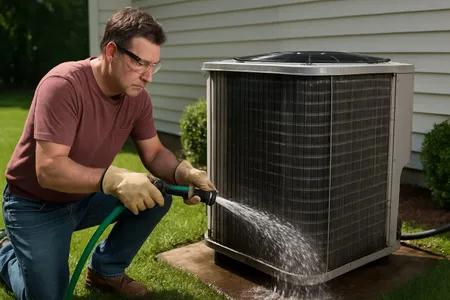
- Clean your AC condenser annually to maintain cooling efficiency. See our guide on how to clean your AC condenser.
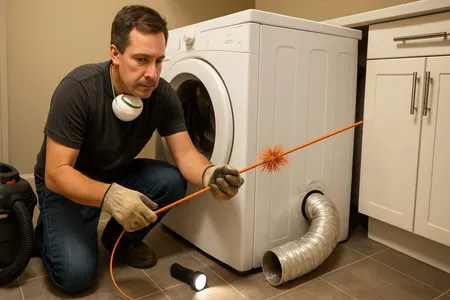
- Clean your dryer vent twice per year to prevent fires and improve dryer performance. Read our guide on how to clean a dryer vent.
- Schedule professional HVAC maintenance at least once per year for cooling systems and once per year for heating systems.
- Use our Maintenance Checklist to track all your home maintenance tasks throughout the year.
Frequently Asked Questions
Can I wash and reuse my furnace filter?
Only if it is specifically labeled as washable or reusable. Most disposable fiberglass and pleated filters cannot be washed and must be replaced. Washable filters are typically electrostatic and have a metal or plastic frame. Rinse them with water, let them dry completely, and reinstall.
What happens if I use the wrong size filter?
An undersized filter will have gaps around the edges, allowing unfiltered air to bypass the filter entirely. An oversized filter will not fit in the slot. Either situation means your system is not being properly filtered. Always match the exact nominal size printed on your current filter.
Is a more expensive filter always better?
Not necessarily. A premium MERV 13 filter in a system designed for MERV 8 can cause more harm than good by restricting airflow. The “best” filter is one that matches your system’s requirements and your household’s air quality needs.
Should I change my filter even if I do not use my HVAC system?
Yes. Even when the system is not actively heating or cooling, the blower may still circulate air if the fan is set to ON. Dust also settles on a stationary filter. Check it every 90 days regardless of usage.
Want a professional to inspect your HVAC system? Visit our maintenance page to schedule a tune-up. In Central Texas? Texas Temp Masters offers comprehensive HVAC maintenance with filter replacement included. Call (817) 704-0706 to book an appointment.
Next Steps
Keep your HVAC system running smoothly with these additional resources:
- Find the right filter fast — Use our Filter Size Finder to look up the correct size and MERV rating for your specific system.
- Extend your furnace’s life — Learn how long furnaces typically last and what maintenance habits make the biggest difference.
- Prepare your whole system for winter — Our winter HVAC maintenance checklist covers everything beyond the filter that needs attention before the cold arrives.
- Ready to talk? — Contact us for a free evaluation or to schedule a professional tune-up.