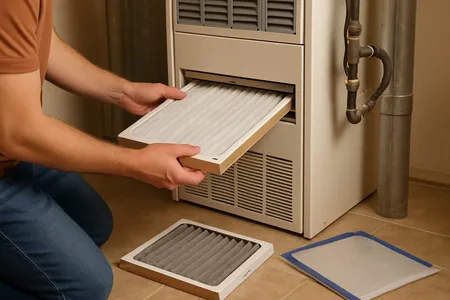
A clogged dryer vent is more than just an inconvenience that makes clothes take longer to dry. According to the National Fire Protection Association (NFPA), dryers cause an estimated 15,970 home fires each year, and the leading cause is failure to clean the dryer vent. Lint is highly flammable, and when it accumulates in the vent system, it creates a serious fire hazard while also wasting energy and shortening your dryer’s lifespan.
Cleaning your dryer vent is a straightforward DIY task that takes about 30 to 60 minutes and should be done at least twice a year.
What You Will Need
- Dryer vent cleaning brush kit (long flexible brush, typically 12 to 20 feet)
- Vacuum with hose attachment
- Screwdriver or nut driver (for clamp removal)
- Flashlight
- Dust mask
- Work gloves
- Trash bag for collected lint
Time estimate: 30 to 60 minutes Difficulty level: Easy to moderate
Warning Signs Your Dryer Vent Needs Cleaning
Before diving into the cleaning process, check for these warning signs that indicate your vent is overdue for attention:
- Clothes take more than one cycle to fully dry
- The dryer or clothes feel unusually hot after a cycle
- A burning smell occurs during operation
- Visible lint accumulation around the exterior vent hood
- Increased humidity in the laundry room
- The exterior vent flap does not open when the dryer is running
- It has been more than six months since your last vent cleaning
If you notice a burning smell, stop the dryer immediately, unplug it, and clean the vent before using it again.
Step 1: Disconnect the Dryer
- Unplug the dryer from the electrical outlet. For gas dryers, also turn off the gas valve behind the dryer.
- Pull the dryer away from the wall carefully to access the vent connection on the back. Be mindful of the gas line on gas dryers; do not pull so far that you strain or disconnect the gas line.
- Disconnect the vent hose from the back of the dryer. Most vent hoses are secured with a worm-gear clamp or metal tape. Loosen the clamp with a screwdriver and slide the hose off.
Safety Warning: For gas dryers, if you smell gas after moving the dryer, turn off the gas supply immediately, ventilate the area, and call your gas company. Do not create sparks or flames.
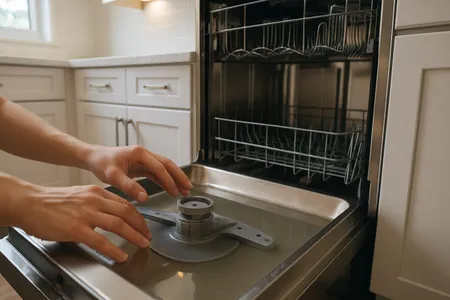
Step 2: Clean the Lint Trap Housing
Before cleaning the vent duct itself, clean the lint trap area inside the dryer:
- Remove the lint screen and clean it as you normally would.
- Using a long, narrow vacuum attachment or a lint trap brush, reach down into the lint trap housing and vacuum out accumulated lint. You will likely be surprised at how much lint collects inside this area below the screen.
- Some lint trap brushes are flexible and can reach 2 to 3 feet into the housing.
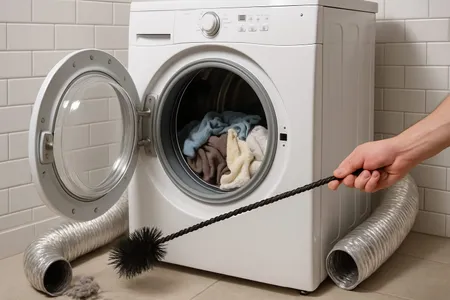
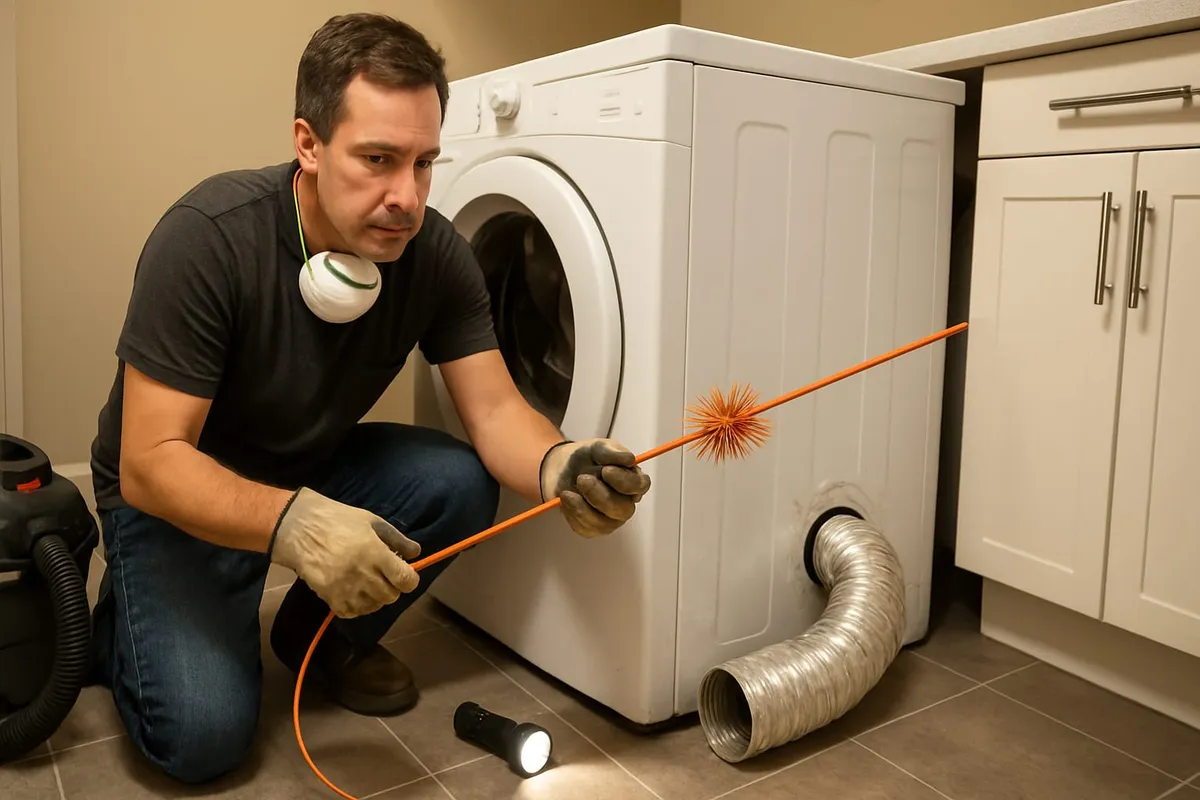
Step 3: Clean the Vent Duct from the Dryer End
- Insert the dryer vent cleaning brush into the vent opening on the back of the dryer (or into the disconnected vent duct).
- Push the brush through the duct, rotating it as you go to dislodge lint from the walls. Most brush kits have flexible rods that connect together, allowing you to reach 12 to 20 feet.
- Pull the brush out, bringing lint and debris with it.
- Repeat 2 to 3 times until minimal lint comes out.
- Use the vacuum to clean up dislodged lint from the duct opening and the area behind the dryer.
Step 4: Clean the Exterior Vent
- Go outside and locate the exterior vent hood where the dryer vent exits your home. It is usually on an exterior wall near the laundry room.
- Remove the vent cover if possible (some are secured with screws).
- Insert the cleaning brush from the outside and push it through as far as it will go, rotating to dislodge lint.
- Pull the brush out and vacuum any loose lint from the vent opening.
- Check that the exterior vent flap moves freely and is not stuck with lint or debris.
- Replace the vent cover.
Step 5: Inspect the Vent Hose
Before reconnecting, inspect the flexible vent hose:
- Check for kinks or crushes that restrict airflow.
- Look for holes or tears in the hose material.
- Consider upgrading from a flexible foil or vinyl hose to a rigid or semi-rigid aluminum duct, which is safer and more efficient. Vinyl and thin foil hoses can sag, collect lint, and are more flammable.
- Keep the duct run as short and straight as possible. Every 90-degree turn in the ductwork is equivalent to adding about 5 feet of length, which increases lint accumulation and reduces airflow.
Step 6: Reconnect and Test
- Reconnect the vent hose to the dryer outlet and secure it with the clamp.
- Push the dryer back to the wall, making sure not to crush or kink the vent hose.
- Plug the dryer back in (and turn the gas valve back on for gas dryers).
- Run the dryer on the air-only or fluff cycle for 5 to 10 minutes.
- Go outside and verify that warm air is flowing from the exterior vent and the flap is opening properly.
- Check for any air leaks at connections.
Safety Warnings
- Never use your dryer if you suspect a vent blockage. A blocked vent can cause the dryer to overheat and ignite accumulated lint.
- Do not use a leaf blower to clean the vent. While it may seem effective, it can push lint into joints and connections where it compacts and becomes harder to remove.
- Gas dryer safety: Be extremely careful when moving a gas dryer. Never disconnect the gas line yourself unless you are experienced with gas connections. If the gas line is too short to pull the dryer away safely, call a professional.
- Do not use flexible vinyl or thin foil ducts. These materials can sag, trap lint, and are flammable. Use rigid or semi-rigid aluminum ducting rated for dryer venting.
- Ensure your dryer vent exhausts outdoors, not into an attic, crawl space, or garage. Venting into an enclosed space creates moisture problems and fire hazards.
When to Call a Professional
Handle the cleaning yourself for short, accessible vent runs, but call a professional if:
- Your vent duct is longer than 15 to 20 feet
- The duct has multiple 90-degree turns
- The duct runs through walls, ceilings, or the attic and is not easily accessible
- You cannot access the exterior vent hood
- You have a dryer on the second floor with a long vent run to the ground
- You find excessive lint buildup that your brush cannot fully clear
- You suspect an animal has nested in the vent
Professional dryer vent cleaning typically costs $100 to $200 and includes a full inspection of the vent system.
How Often Should You Clean Your Dryer Vent?
| Household Size | Cleaning Frequency |
|---|---|
| 1–2 people (2–3 loads/week) | Once per year |
| 3–4 people (5–7 loads/week) | Twice per year |
| 5+ people (8+ loads/week) | Three times per year |
| Pets in the home | Add one extra cleaning per year |
Clean the lint trap before every single dryer load. This is the most important daily maintenance step for your dryer.
Related Maintenance Tips
- Clean your dryer’s moisture sensor (usually located inside the drum near the lint trap) with rubbing alcohol and a soft cloth once a month to maintain drying accuracy.
- Check your gas dryer’s exhaust for carbon monoxide. Install a CO detector near your laundry area.
- Learn how long your dryer should last in our washer and dryer lifespan guide.
- Track all your maintenance tasks with our Maintenance Checklist Tool.
Frequently Asked Questions
How do I know if my dryer vent is too long?
Most dryer manufacturers recommend a maximum vent length of 25 feet for a straight run, with 5 feet deducted for each 90-degree elbow. If your total equivalent length exceeds the manufacturer’s recommendation, consider having a booster fan installed or relocating the dryer closer to an exterior wall.
Can a clogged dryer vent cause carbon monoxide poisoning?
Yes, for gas dryers. A blocked vent can cause combustion gases, including carbon monoxide, to back up into the home. This is why it is essential to have a working carbon monoxide detector near your laundry area if you have a gas dryer.
Is it safe to use dryer sheets?
Dryer sheets are generally safe, but they leave a waxy residue on the lint screen that reduces airflow over time. If you use dryer sheets, wash the lint screen with warm soapy water and a soft brush once a month to remove the residue buildup.
What is the best type of dryer duct material?
Rigid aluminum duct is the best choice. It has a smooth interior that resists lint accumulation, is non-flammable, and provides the most efficient airflow. Semi-rigid aluminum is the next best option. Avoid flexible vinyl or thin foil ducts, which are fire hazards.
Need professional dryer vent cleaning or inspection? In Central Texas, Texas Temp Masters can clean and inspect your entire dryer vent system. Call (817) 704-0706 to schedule service and protect your home from dryer fires.
Next Steps
Now that your vent is clean, keep your dryer in top shape:
- Check your dryer’s age — Use our Appliance Age Decoder to find out how old your dryer is and whether it is approaching the end of its expected lifespan.
- Dryer still not heating? — If cleaning the vent did not solve the problem, our dryer not heating guide covers every other common cause from blown thermal fuses to failed heating elements.
- Know when to replace — Read how long do washers and dryers last for brand-by-brand lifespan data and repair vs. replace guidance.
- Ready to talk? — Contact us for a free evaluation.