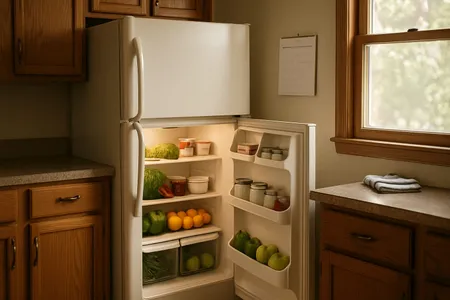
When your refrigerator stops cooling properly, it is more than just an inconvenience — you are racing against the clock to save hundreds of dollars worth of perishable food. According to the USDA, refrigerated food becomes unsafe after being above 40 degrees Fahrenheit for more than two hours. The good news is that many cooling problems have simple causes that you can diagnose and fix yourself in minutes. Before you call a repair technician, work through this guide to identify the issue and determine whether it is a quick DIY fix or something that requires professional expertise. We cover everything from basic checks that anyone can do to more complex problems that explain why your fridge is not keeping food cold.
Quick Fix Checklist
These five checks take less than five minutes and resolve the problem in a surprising number of cases:
- Make sure the fridge is plugged in — Check that the power cord is fully seated in the outlet. Open the door and verify the interior light turns on.
- Check the temperature settings — The refrigerator should be set to 37 degrees Fahrenheit (or the manufacturer’s recommended setting). The freezer should be at 0 degrees Fahrenheit. Someone may have accidentally bumped the control dial.
- Check for overpacking — An overcrowded fridge blocks air vents and prevents cold air from circulating. Make sure items are not pushed against the back wall where vents are located.
- Make sure the doors close completely — Check that no containers, drawers, or shelves are preventing the door from sealing fully. Listen for the click or feel the magnetic seal engage.
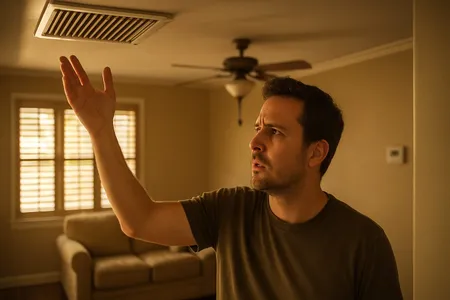
- Listen for the compressor — Put your ear near the bottom rear of the fridge. You should hear a low humming sound. If you hear nothing, the compressor may not be running.
1. Temperature Controls Set Incorrectly
What It Is and Why It Happens
Refrigerator temperature controls can be bumped accidentally when loading or unloading groceries, or someone in the household may have adjusted them without realizing the impact. Some older models use numbered dials (1 through 5 or 1 through 9) rather than actual temperature settings, making it easy to set them incorrectly. Additionally, after a power outage, some refrigerators reset their temperature controls to factory defaults, which may not be optimal.
How to Check
Locate the temperature control, which is typically inside the fresh food compartment near the top or on the back wall. For models with a digital display, check the set temperature — it should read 37 degrees Fahrenheit for the refrigerator and 0 degrees Fahrenheit for the freezer. For dial-type controls, set it to the middle position (usually 3 or 4 on a 5-point scale, or 5 on a 9-point scale). Use an inexpensive refrigerator thermometer to verify the actual temperature inside the unit.
How to Fix
Adjust the temperature control to the recommended setting. Keep in mind that it takes 24 hours for the refrigerator to stabilize at a new temperature. Do not make multiple adjustments in a short period. Place a thermometer in the center of the middle shelf and check it after 24 hours.
Estimated cost: Free (DIY fix). A refrigerator thermometer costs $5 to $10.
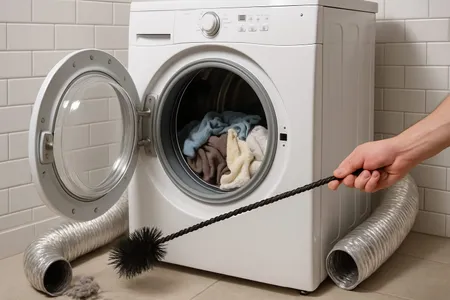
2. Dirty Condenser Coils
What It Is and Why It Happens
The condenser coils are where your refrigerator releases the heat it has absorbed from inside the compartments. On most models, the coils are located either on the back of the refrigerator or underneath it behind the kick plate. Over time, dust, pet hair, grease, and cobwebs coat the coils, acting as insulation that prevents heat from dissipating. When the coils cannot release heat efficiently, the compressor works harder and longer but cannot cool the interior properly. In severe cases, the compressor overheats and shuts down entirely.
How to Check
Pull the refrigerator away from the wall and look at the back. If the coils are on the back, you will see a grid of metal tubing that may be coated with dust. If you do not see coils on the back, they are underneath — remove the kick plate at the bottom front of the refrigerator by pulling or unsnapping it. Use a flashlight to inspect the coils. If they are visibly coated with dust or debris, they need cleaning.
How to Fix
- Unplug the refrigerator or turn off the circuit breaker.
- Use a condenser coil cleaning brush (available at hardware stores for $5 to $10) to gently brush dust and debris off the coils.
- Vacuum up the loosened debris with a vacuum attachment or handheld vacuum.
- If the coils are underneath, also clean the area around the condenser fan.
- Replace the kick plate and push the refrigerator back into position, maintaining at least 1 inch of clearance from the wall for airflow.
- Plug the refrigerator back in and allow 24 hours for temperatures to stabilize.
Clean condenser coils every 6 to 12 months. Homes with pets may need more frequent cleaning due to pet hair accumulation.
Estimated cost: $5 to $10 for a coil brush (DIY fix). Professional coil cleaning costs $60 to $100.
3. Blocked Air Vents
What It Is and Why It Happens
Your refrigerator circulates cold air from the freezer compartment into the fresh food compartment through internal air vents. These vents are typically located on the back wall of the refrigerator section and sometimes between the two compartments. When food items, containers, or ice buildup block these vents, cold air cannot circulate properly, and the fresh food section warms up while the freezer may actually get too cold.
How to Check
Open the refrigerator and locate the air vents. They are usually small louvered openings on the back wall, the top of the fresh food section, or between the freezer and refrigerator sections. Check whether any food containers, bags, or other items are pushed directly against or over these vents. Also look for frost or ice buildup around the vents, which can indicate a defrost system problem.
How to Fix
Reorganize the contents to ensure nothing is blocking the air vents. Leave at least 1 inch of space between food items and the back wall. Avoid overpacking — a good rule is to keep the refrigerator about 75 percent full for optimal air circulation. If you find ice buildup around the vents, this may indicate a failing defrost system (see the section on frost-clogged evaporator coils below).
Estimated cost: Free (DIY fix).
4. Damaged or Dirty Door Gaskets
What It Is and Why It Happens
The door gasket (also called the door seal) is the flexible rubber strip that runs around the edge of the refrigerator and freezer doors. It creates an airtight seal when the door closes, keeping warm air out and cold air in. Over time, gaskets can become dirty (food residue prevents a proper seal), warped, torn, or hardened from age. A compromised gasket allows warm, humid air to continuously enter the compartment, forcing the compressor to work overtime and often leading to moisture, frost, and temperature problems.
How to Check
Close the door on a dollar bill so that half of it is inside the refrigerator. Try to pull the bill out. If it slides out easily with little resistance, the gasket is not sealing properly in that spot. Repeat this test at several points around the door. Also visually inspect the gasket for tears, cracks, deformation, or mold.
How to Fix
For dirty gaskets: Clean the gasket thoroughly with warm, soapy water and a soft cloth or sponge. Pay special attention to the folds and creases where food debris and mold accumulate. Dry completely. Apply a thin layer of petroleum jelly to the gasket to keep it supple and improve the seal.
For deformed gaskets: If the gasket has warped slightly, try using a hair dryer on low heat to gently warm the rubber and reshape it. Hold the gasket in the correct position until it cools.
For torn or heavily worn gaskets: Replace the gasket. Replacement gaskets for most refrigerator models cost $30 to $75 and can be installed by snapping or screwing them into the door channel. Some newer models may require the inner door panel to be removed for gasket replacement.
Estimated cost: Free for cleaning (DIY fix). $30 to $75 for a replacement gasket. Professional installation costs $100 to $200.
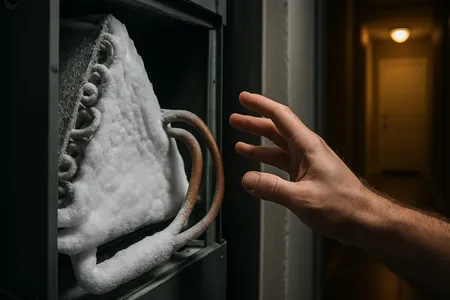
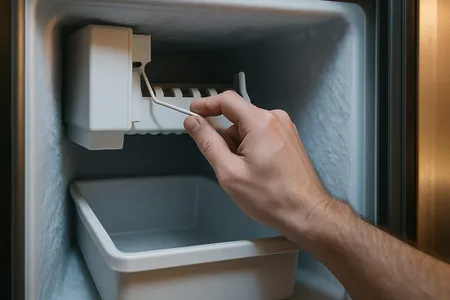
5. Frost-Clogged Evaporator Coils
What It Is and Why It Happens
Most modern refrigerators use an automatic defrost system that periodically heats the evaporator coils (located behind the back panel of the freezer) to melt frost buildup. If the defrost system fails — whether due to a broken defrost heater, a failed defrost thermostat, or a faulty defrost timer or control board — frost continues to accumulate on the evaporator coils. Eventually, the frost becomes thick enough to block airflow entirely, and the refrigerator stops cooling even though the compressor is still running.
How to Check
Open the freezer and check for heavy frost or ice buildup on the back wall or around the evaporator cover panel. If the back wall of the freezer is covered in a thick layer of frost (more than a quarter inch), the defrost system is likely not working. Another sign is if the freezer works fine but the refrigerator section is warm — frost may be blocking the vent between the two compartments.
How to Fix
Temporary fix: Unplug the refrigerator and leave both doors open for 24 to 48 hours to allow all the ice to melt completely. Place towels on the floor to absorb the meltwater. Once fully defrosted, plug the refrigerator back in and check if cooling returns to normal.
If the problem recurs within a few weeks, the defrost system has a failed component and needs professional repair. Call a professional to diagnose whether the defrost heater, defrost thermostat, defrost timer, or defrost control board has failed.
Estimated cost: Professional defrost system repair costs $200 to $450 depending on which component has failed.
6. Malfunctioning Evaporator or Condenser Fan
What It Is and Why It Happens
Your refrigerator has two fans that are critical to the cooling process. The evaporator fan (inside the freezer compartment, behind the back panel) circulates cold air from the evaporator coils throughout the freezer and refrigerator sections. The condenser fan (at the bottom rear of the refrigerator, near the compressor) pulls air across the condenser coils to release heat. If either fan fails, cooling performance drops dramatically.
How to Check
Evaporator fan: Open the freezer door and listen for the fan running. On most models, the fan stops when you open the door (a door switch turns it off). Press and hold the door switch while the door is open — you should hear the fan start. If the fan does not run, it has either failed or is jammed.
Condenser fan: Pull the refrigerator away from the wall and remove the bottom rear panel. With the refrigerator plugged in, you should see and hear the fan spinning when the compressor is running. If the fan is not spinning, check for debris (dust balls, paper, a fallen item) blocking the blades.
How to Fix
For debris blocking the fan: Clear the obstruction and test again. Clean the area around the fan while you have access.
For a failed fan motor: Call a professional. Fan motor replacement involves working with electrical connections inside the appliance. The evaporator fan especially requires removing the back panel inside the freezer and working with wiring.
Estimated cost: Professional fan motor replacement costs $150 to $400 depending on the fan location and the refrigerator model.
7. Compressor Issues
What It Is and Why It Happens
The compressor is the motor that circulates refrigerant through the sealed cooling system. It is the most critical (and most expensive) component in your refrigerator. A failing compressor may run continuously without adequately cooling, cycle on and off rapidly, or refuse to start at all. Compressor problems can result from normal wear over time, overheating due to dirty condenser coils, electrical issues, or refrigerant leaks.
How to Check
Place your ear near the bottom rear of the refrigerator. A healthy compressor produces a low, steady humming sound. Warning signs of compressor problems include:
- The compressor clicks on and off every few seconds
- A loud buzzing or rattling sound from the rear
- The compressor runs constantly but the refrigerator does not get cold
- No sound at all (the compressor is not running)
- The sides or back of the refrigerator are excessively hot
How to Fix
Call a professional. Compressor diagnosis and repair involve working with sealed refrigerant systems (which requires EPA certification), high-voltage electrical components, and specialized equipment. Depending on the age of your refrigerator and the cost of the repair, replacement of the entire unit may be more economical. Use our repair or replace calculator to help with this decision.
Estimated cost: Compressor replacement costs $700 to $1,250 or more. Given that a new mid-range refrigerator costs $800 to $1,500, compressor replacement often does not make financial sense on older units.
When to Call a Professional
Contact a refrigerator repair technician if:
- The compressor is not running or cycles on and off rapidly — This indicates a compressor or relay issue that requires professional diagnosis.
- You have cleaned the coils and checked all vents but cooling has not improved after 24 hours — There may be a refrigerant leak or sealed system problem.
- Heavy frost accumulates on the back wall of the freezer within days of defrosting — The defrost system has a failed component.
- The refrigerator is leaking water onto the floor — This could indicate a clogged defrost drain, a cracked drain pan, or a water supply issue.
- You hear loud grinding, knocking, or clicking sounds — These indicate mechanical component failure.
Food Safety Tip: If your refrigerator has been above 40 degrees Fahrenheit for more than two hours, perishable foods such as meat, dairy, cut produce, and leftovers should be discarded, according to USDA guidelines. When in doubt, throw it out.
For appliance help, use our troubleshooter tool or contact us directly.
Prevention Tips
Protect your food investment and extend the life of your refrigerator with these habits:
- Clean condenser coils every 6 to 12 months — This is the most impactful maintenance task for refrigerator performance and longevity.
- Check and clean door gaskets quarterly — Wipe them with warm soapy water and apply petroleum jelly to keep them flexible.
- Maintain proper temperature settings — 37 degrees Fahrenheit for the refrigerator and 0 degrees Fahrenheit for the freezer. Verify with a thermometer.
- Do not overfill the refrigerator — Keep it about 75 percent full and ensure air vents are not blocked by food or containers.
- Allow hot food to cool before refrigerating — Placing hot containers directly in the fridge raises the internal temperature and forces the compressor to work harder.
Frequently Asked Questions
Why is my fridge running but not cooling?
If the compressor is running but the refrigerator is not cooling, the most common causes are dirty condenser coils, blocked air vents, frost-clogged evaporator coils (defrost system failure), or a failed evaporator fan. Start by cleaning the condenser coils and checking that vents are not blocked. If those steps do not help, the defrost system or a fan may have failed.
What is the first thing to check when a refrigerator stops working?
Start with the simplest checks: confirm the refrigerator is plugged in and the outlet has power (the light comes on when you open the door), verify the temperature control has not been accidentally turned down, and check that the circuit breaker has not tripped. These basic checks resolve the problem more often than you might expect.
How long can food last in a fridge that stopped working?
According to the USDA, a refrigerator will keep food safe for about 4 hours if the doors remain closed. A full freezer maintains temperature for approximately 48 hours (24 hours if half full). To maximize this time, keep the doors closed as much as possible. Use a thermometer to check the temperature before deciding whether to keep or discard food.
How do I know if my refrigerator compressor is bad?
Signs of a failing compressor include the refrigerator not cooling despite the compressor running continuously, the compressor clicking on and off every few seconds, loud buzzing or rattling sounds from the rear of the unit, or the compressor not running at all. The sides or back of the refrigerator being unusually hot is another indicator. A technician can test the compressor with specialized equipment.
Is it worth repairing a refrigerator that is not cooling?
As a general rule, if the repair cost is more than 50 percent of the price of a comparable new refrigerator, replacement is the better financial decision. This is especially true if the refrigerator is more than 10 years old. Simple fixes like coil cleaning, gasket replacement, or fan motor replacement are almost always worth doing. Compressor replacement on an older unit usually is not. Use our repair or replace tool for a personalized recommendation.
A refrigerator that stops cooling does not always mean you need an expensive repair or a brand-new unit. Many of the most common causes can be fixed with basic cleaning and maintenance. Use this guide to work through the possibilities before scheduling a service call.
If you are in Central Texas, Texas Temp Masters offers same-day appliance repair service. Call (817) 704-0706 or contact us online to schedule your appointment.
Next Steps
Now that you know what to check, here are some resources to help you take action:
- Check your fridge’s age — Use our Appliance Age Decoder to find out how old your refrigerator is and whether repairs still make financial sense.
- Stay ahead of problems — Our Maintenance Checklist helps you track coil cleanings, gasket inspections, and other tasks that prevent cooling failures.
- Decide if it is time for a new fridge — Read our guide on how long refrigerators last to understand lifespan by brand and type.
- Troubleshoot related issues — If your ice maker has also stopped working, see our ice maker troubleshooting guide for step-by-step fixes.
- Compare lifespans across appliances — Our appliance lifespan chart covers 20+ appliances so you can plan replacements and budget ahead.
- Ready to talk? — Contact us for a free evaluation.