Your dryer is spinning, clothes are tumbling, but everything comes out just as wet as when it went in. A dryer that runs but does not heat is one of the most common appliance problems, and it affects both electric and gas dryers. The root cause can range from something as simple as a clogged lint trap or a tripped breaker to a failed internal component like a heating element or thermal fuse. Before you schedule an expensive repair visit, this guide walks you through every likely cause with clear diagnosis steps so you can determine whether this is a quick DIY fix or a job for a technician. Many of these issues can be resolved in under 30 minutes with basic tools.
Quick Fix Checklist
Check these items first — they account for the majority of “dryer not heating” situations:
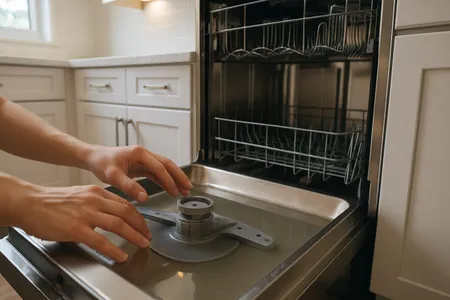
- Clean the lint trap — A heavily clogged lint screen can reduce airflow enough to trigger a thermal fuse, cutting off heat. Remove the screen and clear all lint. If the screen is coated with dryer sheet residue, scrub it with warm soapy water and a brush.
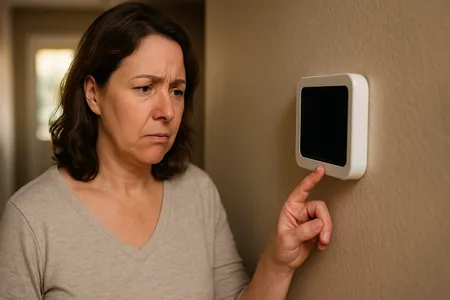
- Check the circuit breaker (electric dryers) — Electric dryers use 240 volts from two linked breakers. If one breaker trips, the dryer may still spin (on 120V) but not heat (which requires 240V). Check both breakers and reset if needed.
- Check the gas supply (gas dryers) — Verify the gas shutoff valve behind the dryer is open (handle parallel to the pipe). If the valve is closed, the dryer will tumble but cannot produce heat.
- Check the exhaust vent — Go outside and check the dryer vent exhaust while the dryer is running. You should feel strong, warm airflow. If airflow is weak, the vent may be clogged.
- Avoid overloading — An overloaded dryer cannot circulate hot air through the clothes effectively. If you filled the drum to capacity, try running a smaller load.
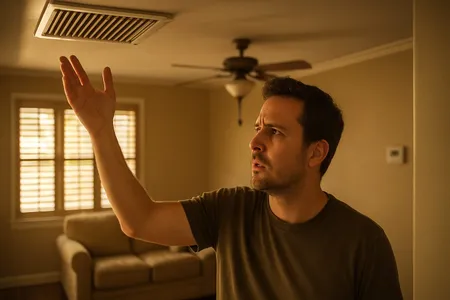
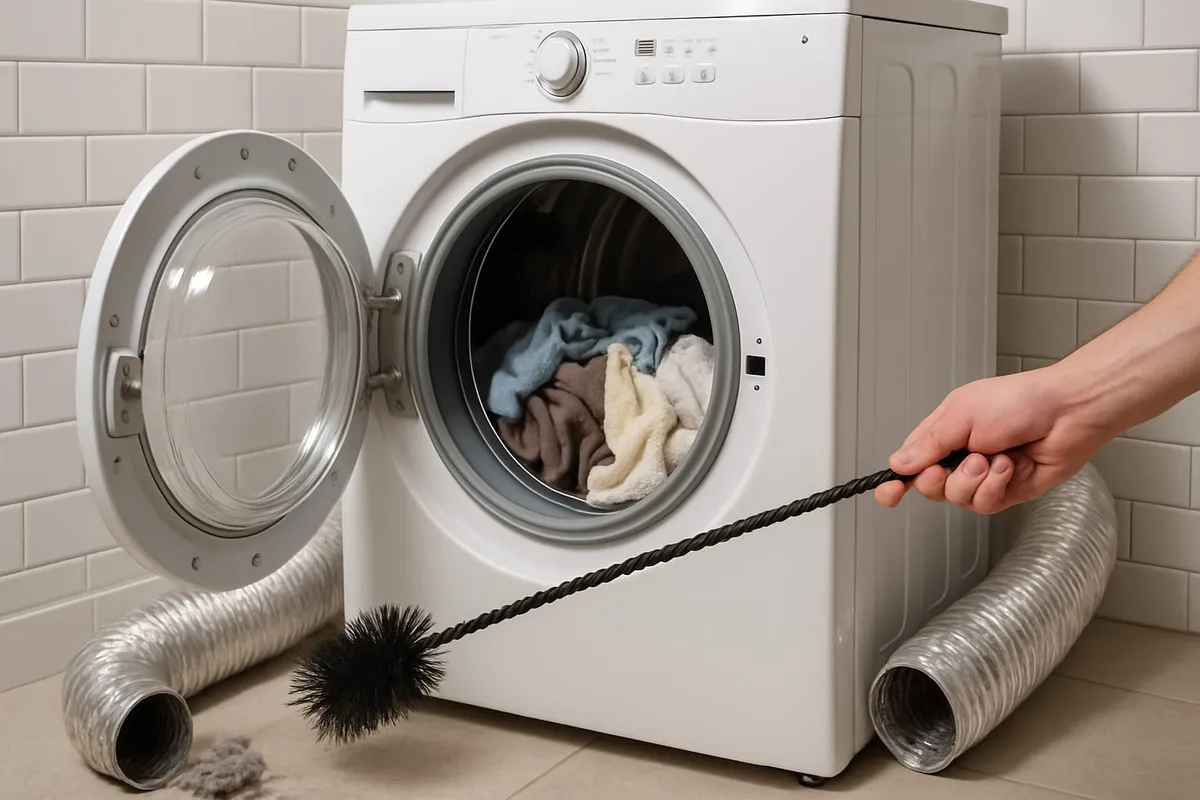
1. Clogged Lint Trap or Exhaust Vent
What It Is and Why It Happens
The dryer exhaust system consists of the lint trap (inside the dryer), the exhaust duct (the flexible or rigid tube running from the back of the dryer to the outside of your home), and the exterior vent cover. When any part of this system becomes clogged with lint, dryer sheet residue, or debris, hot air cannot escape. This causes the dryer to overheat internally, which trips safety devices (the thermal fuse or high-limit thermostat) that shut off the heating element or gas burner. According to the U.S. Fire Administration, clogged dryer vents are responsible for approximately 2,900 home fires each year, so this is both a performance and safety issue.
How to Check
Lint trap: Remove the lint screen and check for lint buildup. Even if you clean it after every load, dryer sheet residue can coat the screen mesh and restrict airflow. Run water over the screen — if water pools on the surface instead of flowing through, the screen has residue buildup.
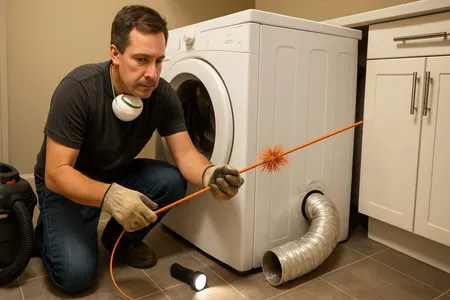
Exhaust vent: While the dryer is running, go outside and check the exhaust vent opening. You should feel strong airflow and warm air. If the airflow is weak or you feel no air, the vent is clogged. Also check the vent flapper — it should open freely when the dryer is running.
Duct inspection: Pull the dryer away from the wall and disconnect the exhaust duct from the back of the dryer. Look inside both the duct and the dryer exhaust port for lint accumulation.
How to Fix
- Clean the lint screen thoroughly. For residue buildup, scrub with warm water, dish soap, and a soft brush, then dry completely.
- Disconnect the exhaust duct and use a dryer vent cleaning brush kit (a long, flexible brush available at hardware stores for $15 to $30) to clean the entire length of the duct from both ends.
- Vacuum out any lint from the dryer’s exhaust port.
- Reconnect the duct, ensuring all connections are secure and there are no kinks.
- Clear the exterior vent cover of any debris.
Clean the full exhaust vent system at least once a year. Homes that do heavy laundry may need more frequent cleaning.
Fire Safety Warning: Clogged dryer vents are a leading cause of house fires. If you cannot clean the vent yourself (long runs, multiple turns, or roof-mounted vents), hire a professional dryer vent cleaning service.
Estimated cost: Free to $30 for a vent cleaning brush kit (DIY fix). Professional vent cleaning costs $75 to $200.
2. Tripped Circuit Breaker (Electric Dryers)
What It Is and Why It Happens
Electric dryers require 240 volts of electricity to power the heating element. This power is supplied through a double-pole circuit breaker in your electrical panel — essentially two linked 120-volt breakers. In some cases, only one side of the breaker trips. When this happens, the dryer receives 120 volts: enough to run the motor, drum, and control panel, but not enough to power the 240-volt heating element. The dryer appears to work normally but does not produce heat.
How to Check
Go to your electrical panel and find the double breaker for the dryer (it will be a larger breaker, typically 30 amps). Check if either side has tripped. Even if the breaker appears to be in the “On” position, push it firmly to “Off” and then back to “On” — sometimes a breaker can trip without moving fully to the middle position.
How to Fix
Reset the breaker by turning it fully off, then back on. If the dryer now heats, the issue was a one-time trip (possibly from a power surge). If the breaker trips again, stop using the dryer and call an electrician. A repeatedly tripping breaker indicates an electrical fault that could be a fire hazard.
Estimated cost: Free (DIY fix). Electrical repair if the breaker continues tripping costs $150 to $400.
3. Blown Thermal Fuse
What It Is and Why It Happens
The thermal fuse is a one-time-use safety device that permanently breaks the circuit to the heating element if the dryer overheats. Once blown, the thermal fuse does not reset — it must be replaced. Thermal fuses blow because of restricted airflow (clogged lint trap or exhaust vent), a failed thermostat that does not regulate temperature, or a malfunctioning cycling thermostat. This is the most common internal component failure that causes a dryer not to heat.
How to Check
The thermal fuse is located on the exhaust duct inside the dryer (you will need to remove the back panel or front lower panel depending on your model). It is a small, flat device about 1 to 2 inches long with two wires connected to it. Test it with a multimeter set to continuity. If the fuse has no continuity (the multimeter does not beep), it is blown and needs replacement.
How to Fix
Replace the thermal fuse with an exact replacement part (search your dryer model number to find the correct part). Thermal fuses are inexpensive ($5 to $25 for the part). However, simply replacing the fuse without addressing the underlying cause (typically a clogged vent) will result in the new fuse blowing again. Always clean the exhaust vent system thoroughly before or during thermal fuse replacement.
Estimated cost: $5 to $25 for the part (DIY repair with basic tools). Professional replacement costs $100 to $250.
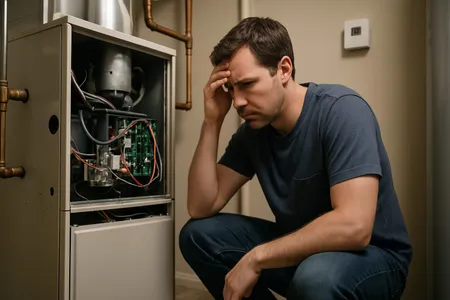
4. Failed Heating Element (Electric Dryers)
What It Is and Why It Happens
The heating element in an electric dryer is a coil of resistance wire that glows red-hot when electricity passes through it. Air passes over this coil and is heated before entering the drum. Over time, the heating element can break (the wire physically separates) or partially short-circuit (touching the housing and grounding out). A broken element produces no heat at all. A grounded element may produce some heat but trip the thermal fuse or breaker. Heating elements typically last 8 to 18 years depending on usage.
How to Check
Unplug the dryer and access the heating element (location varies by model — consult your owner’s manual or search for your model online). Visually inspect the coil for breaks. Test the element with a multimeter set to resistance (ohms). A working element typically reads between 10 and 50 ohms. An open reading (infinity or OL) means the element is broken.
How to Fix
Replace the heating element with the correct part for your dryer model. This is a moderately advanced DIY repair that requires removing panels, disconnecting wires, and potentially removing the drum. If you are comfortable with appliance repair, heating elements cost $30 to $100 for the part. Otherwise, call a professional for replacement.
Estimated cost: $30 to $100 for the part (DIY). Professional replacement costs $150 to $350 including parts and labor.
5. Faulty Gas Valve Solenoids (Gas Dryers)
What It Is and Why It Happens
Gas dryers use solenoid-operated gas valves to control the flow of gas to the burner. Most gas dryers have two or three solenoid coils that work together to open the gas valve when heat is needed. When a solenoid fails, the gas valve cannot open fully (or at all), and the burner does not ignite or ignites intermittently. A characteristic symptom of failing gas valve solenoids is a dryer that heats for part of the cycle but then stops heating, or a dryer that does not heat at all. The igniter may glow orange but the gas never ignites.
How to Check
Start a drying cycle and watch through the front of the dryer (some models have a small access panel or you can tilt the dryer to see underneath). You should see the igniter glow orange, then the gas should ignite with a visible blue flame. If the igniter glows but the gas does not ignite, the gas valve solenoids are likely faulty. If the igniter does not glow at all, the problem is the igniter itself (see below).
How to Fix
Gas valve solenoid replacement requires disassembling part of the dryer to access the gas valve assembly. The solenoid coils slide on and off the valve body and are held by clips. This repair involves working near the gas supply. If you are experienced with appliance repair, solenoid kits cost $15 to $40. If you are not comfortable working with gas appliances, call a professional.
Safety Warning: Always turn off the gas supply before working on a gas dryer. If you smell gas at any point, stop immediately, ventilate the area, and call your gas company.
Estimated cost: $15 to $40 for a solenoid kit (DIY). Professional replacement costs $150 to $300.
6. Defective Igniter (Gas Dryers)
What It Is and Why It Happens
Gas dryers use a glow-bar igniter to light the gas burner. The igniter draws electrical current through a circuit that includes the gas valve solenoids. When the igniter gets hot enough (glowing bright orange), it allows current to flow to the gas valve solenoids, which open the valve and gas flows to the burner where the hot igniter lights it. If the igniter cracks or weakens with age, it may not get hot enough to trigger the gas valve, so the gas never flows and the dryer does not heat. Igniters typically last 5 to 8 years.
How to Check
Watch the igniter during a drying cycle. If it does not glow at all, it has failed and needs replacement. If it glows but appears dim (dull orange rather than bright orange/white) and the gas does not ignite, it may be too weak to open the gas valve.
How to Fix
Call a professional unless you are experienced with appliance repair. Igniter replacement requires accessing the burner assembly inside the dryer and working near the gas line. The igniter is a fragile component that can break from physical impact or oil from bare fingers.
Estimated cost: Igniter replacement costs $100 to $250 including parts and labor.
7. Faulty Cycling Thermostat or High-Limit Thermostat
What It Is and Why It Happens
The cycling thermostat regulates the dryer temperature by turning the heating element or gas burner on and off during the drying cycle. The high-limit thermostat is a safety device that shuts off heat if the temperature gets dangerously high. If the cycling thermostat fails in the open position, it will never signal the heat source to turn on, and the dryer will not heat. If the high-limit thermostat has tripped or failed, it will also prevent the heating element or gas burner from operating.
How to Check
Test both thermostats with a multimeter set to continuity. The cycling thermostat should have continuity at room temperature (it is a normally closed switch). The high-limit thermostat should also have continuity at room temperature. If either reads open (no continuity), it has failed or tripped.
How to Fix
Replace the faulty thermostat with an exact replacement part. Like the thermal fuse, a tripped high-limit thermostat often indicates a vent airflow problem. Clean the exhaust vent system before or during thermostat replacement to prevent the issue from recurring.
Estimated cost: $10 to $30 for the thermostat part. Professional replacement costs $100 to $250.
When to Call a Professional
Contact an appliance repair technician if:
- You are not comfortable testing electrical components with a multimeter — Dryer troubleshooting beyond basic checks involves working with high-voltage electricity (240V for electric dryers) and gas connections, both of which carry serious safety risks.
- The dryer trips the circuit breaker repeatedly — This indicates a short circuit in the wiring, heating element, or motor that could cause a fire.
- You smell gas around a gas dryer — Turn off the gas supply, ventilate the area, and call a professional or your gas company.
- The drum turns but makes grinding, squealing, or banging sounds — While not directly related to heating, these indicate mechanical problems that should be addressed.
- You have replaced the thermal fuse and it blows again quickly — The underlying cause (usually a vent blockage or failed thermostat) has not been resolved.
For appliance service, visit our contact page or use our troubleshooter tool.
Prevention Tips
Keep your dryer heating reliably and safely with these maintenance habits:
- Clean the lint trap after every load — This takes 10 seconds and is the single most important dryer maintenance task.
- Clean the full exhaust vent system annually — Use a dryer vent brush kit or hire a professional. This prevents thermal fuse failure and significantly reduces fire risk.
- Do not overload the dryer — Overloading reduces airflow and forces the dryer to run longer and hotter, accelerating component wear.
- Use the correct heat setting — Use lower heat for delicates and synthetics. Excessive heat accelerates wear on heating elements and thermostats.
- Inspect the exhaust vent connection — Periodically check that the duct is securely connected to both the dryer and the wall, with no kinks. Replace flexible vinyl or foil ducts with rigid or semi-rigid metal duct, which is safer and more durable.
Frequently Asked Questions
Why is my dryer spinning but not heating?
The most common cause for an electric dryer spinning without heat is a tripped circuit breaker (only one leg of the 240V circuit tripped) or a blown thermal fuse. For gas dryers, the most common causes are a closed gas valve, failed gas valve solenoids, or a defective igniter. In both cases, also check for a clogged lint trap or exhaust vent, which can trigger safety devices that cut off heat.
How do I know if my dryer thermal fuse is blown?
You can test a thermal fuse with a multimeter set to continuity. Unplug the dryer, locate the thermal fuse (on the exhaust duct inside the dryer — you will need to remove a panel), and test across the two terminals. If the multimeter does not beep or show continuity, the fuse is blown. A blown thermal fuse is the most common internal cause of a dryer not heating.
How much does it cost to fix a dryer that is not heating?
Costs vary based on the cause. Cleaning the lint trap and vents is free to $30. A circuit breaker reset is free. A thermal fuse costs $5 to $25 for the part ($100 to $250 professionally installed). A heating element costs $30 to $100 for the part ($150 to $350 installed). Gas valve solenoids cost $15 to $40 ($150 to $300 installed). The average dryer repair costs $100 to $400.
Is it worth repairing a dryer that is not heating?
For most heating issues, yes. Common repairs like thermal fuses, heating elements, igniters, and solenoids are relatively inexpensive compared to the cost of a new dryer ($400 to $1,200). The general rule is that if the repair cost is less than 50 percent of the price of a comparable new dryer and the machine is under 10 years old, repair is worthwhile. Use our repair or replace tool for a personalized assessment.
Can a clogged dryer vent cause a fire?
Yes. According to the U.S. Fire Administration, failure to clean dryer vents is the leading cause of dryer fires, responsible for approximately 2,900 residential fires per year. Lint is highly flammable, and when it accumulates in the exhaust vent, it can ignite from the heat of the dryer. Signs of a dangerously clogged vent include longer drying times, the dryer running very hot to the touch, a burning smell during operation, and the exterior vent flapper not opening during a cycle.
A dryer that is not heating usually has a fixable cause. Start with the simplest checks — the lint trap, circuit breaker, gas valve, and exhaust vent — before moving to internal components. These basic items solve the problem more than half the time.
If you are in Central Texas, Texas Temp Masters offers same-day appliance repair. Call (817) 704-0706 or contact us online to schedule your dryer repair today.
Next Steps
Keep your dryer running safely and efficiently with these resources:
- Find out how old your dryer is — Use our Appliance Age Decoder to decode the manufacture date from your serial number and decide whether repair or replacement makes more sense.
- Build a maintenance routine — Our Maintenance Checklist helps you track lint trap cleanings, vent inspections, and other tasks that prevent heating failures and fire hazards.
- Clean your dryer vent properly — Follow our step-by-step guide on how to clean a dryer vent to improve airflow, reduce energy costs, and prevent fires.
- Know your dryer’s expected lifespan — Read how long do washers and dryers last for brand-by-brand lifespan data and warning signs of failure.
- Compare lifespans across appliances — Our appliance lifespan chart covers 20+ appliances to help you plan and budget for replacements.
- Ready to talk? — Contact us for a free evaluation.